I learned this the hard way. My first season boondocking in a Vermont state park, I picked the prettiest site I could find, tucked under a stand of maples with the brook running behind the trailer. By the second morning, the house battery in my 21-foot trailer was flat. The fridge was barely holding temperature, the lights were dim, and the little 12V fan I run for the dogs on warm afternoons was just a sad whisper. The trailer was perfect. The shade was the problem.
The fix was not a bigger battery or a second generator. It was learning to put the panel where the sun actually is, even when the camper is not. That is the whole job of the DOKIO 200W Folding Solar Panel, and it is the tool I reach for every trip. This is how I charge my trailer battery when the site is shady, step by step, the way I wish someone had shown me six years ago when I started camping with solar.
Put the panel in the sun, keep the battery full
The DOKIO 200W Folding Solar Panel is the piece of gear that makes shady campsites work. It weighs 9.7 pounds, folds down to about 20 by 27 inches, and the long cable lets the panel sit in full sun while the controller stays cool in the shade.
Amazon Check Today's Price on Amazon →Why Shade Is the Real Problem
Most people think the problem is battery size. It is not. A battery only stores what the panel can put back in, and a panel parked under a tree is doing almost nothing. On my setup, the difference between full sun and dappled shade is the difference between waking up to a full battery and waking up to a fridge that is barely holding temperature. I have made both mistakes, and the flat-battery morning is the one that teaches you to respect the sun.
The other mistake is putting the controller in the sun. The DOKIO kit comes with a standalone PWM controller that protects a 12V system against reverse polarity, overcharge, and overload. That controller is the brain of the setup, and every brain works better when it is cool. The 9.84-foot cable that comes with the panel is there for exactly this reason: it lets you separate the two jobs. Panel in the sun, controller in the shade, battery somewhere in between.
What You Need Before You Start
Before we get into the steps, here is what I assume you already have: a 12V battery system in the trailer, a way to connect the panel to it, and about ten feet of open ground within reach of the cable. The DOKIO panel connects with SAE to XT60, alligator clips, or DC, so it will match most trailer batteries without extra adapters. If you are starting from nothing, the panel, the controller, and the included bag are the whole kit. You do not need a separate solar controller, it is already in the box.
One thing I will say plainly: do not buy a bigger battery to fix a shade problem. I thought about it. A bigger battery just gives you a bigger reserve to drain. The panel is what brings power in, and the panel needs sun. If your site is shady, the answer is a panel you can move into the sun, not a battery you cannot move at all.
Step 1: Park the trailer for the sun, not for the postcard
When I pull into a site, I used to look for the view. Now I look for the opening in the trees. On a shady site, I park the trailer so the roof and the sunny side face the morning sun. Even fifteen minutes of early sun on the panel makes a difference, because it gets the battery climbing before the day heats up and before the clouds roll in, which they love to do in the Northeast in the afternoon.
I am not saying park in a parking lot. I am saying take the site with the eastern opening even if the view is a little less pretty. You can walk to the view. You cannot walk your battery to the sun. On my 2016 trailer, that means the awning goes on the shady side and the sunny side stays clear for the panel and the cable.
This is also where the dogs and the cat end up. They get the shady side, the open window, and the 12V fan on warm afternoons. The panel gets the sun. Everyone is happy, and the battery is climbing by the time I finish setting up camp.
Step 2: Unfold the panel and face it at the sun
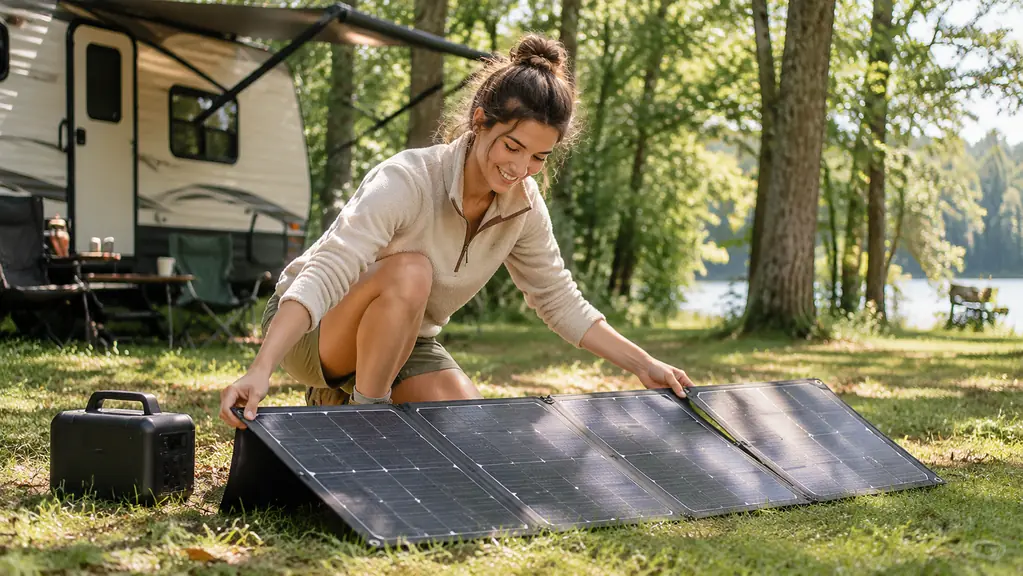
Take the DOKIO panel out of the included bag and unfold it on level ground. The folded size is about 20 by 27 by 1.1 inches, so it fits flat in the back of the truck or on the picnic table without taking over the site. The monocrystalline cells are thin and light, only 9.7 pounds for the whole panel, so moving it around is not a chore even for someone who is not looking for extra gym time at camp.
Face the panel roughly south and tilt it up toward the sun. You do not need a fancy angle finder or a phone app. Check that no shadow from a tree, a post, a cooler, or your own head crosses the cells. A shadow on one corner of a panel drops the whole output, not just that corner. I have stood in front of my own panel more than once and wondered why the amps were low.
I learned this when I set the panel in what I thought was a sunny spot, only to find the trailer's shadow creeping across it by mid-morning. Now I set it at least ten feet from the trailer, on the sunny side, and I walk a slow circle around it to check for shadows before I walk away. That thirty-second check saves me a whole afternoon of weak charging.
Step 3: Run the long cable to the controller in the shade
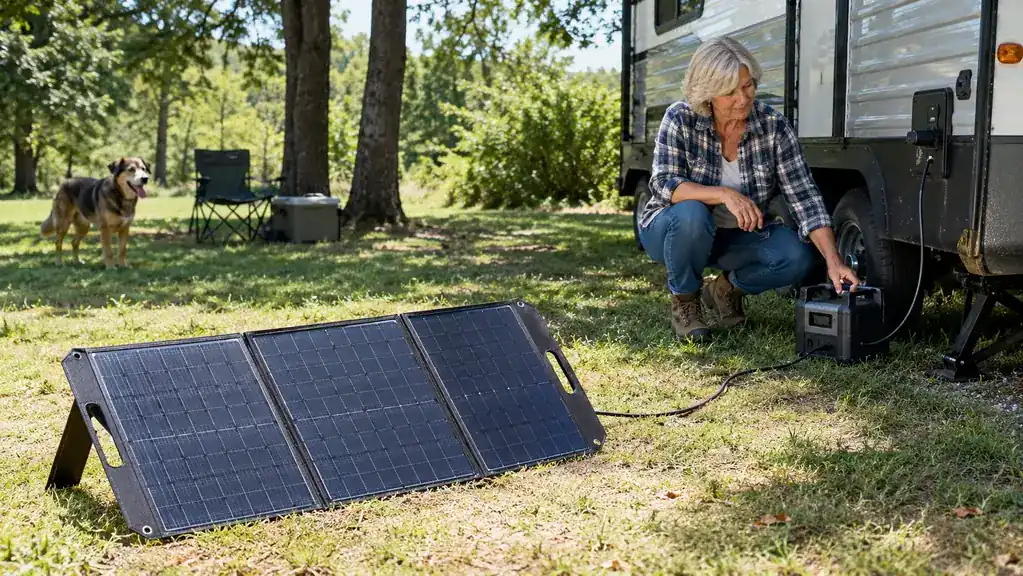
This is the step most people skip, and it is the one the DOKIO panel is built for. The included 9.84-foot cable lets you leave the panel in the sun while the controller sits in the shade next to the battery. The kit connects with SAE to XT60, alligator clips, or DC, so you can match whatever your battery and wiring use without buying a drawer full of adapters.
I run the cable from the panel to the PWM controller, then from the controller to the battery. The controller protects the 12V system against reverse polarity, overcharge, and overload, which matters to me because I blew a fuse my first year by hooking things up wrong. With the clips on the battery terminals, the system just works, and I do not have to think about it again until I check the numbers at midday.
Keep the controller out of direct sun. It is the part doing the thinking, and it stays cooler under the trailer's shadow or beside the battery box. The panel can take the heat, the controller does not need to. On a hot July afternoon, that little bit of shade for the controller is worth more than an extra hour of sun on the panel.
Step 4: Read the numbers at midday
Once everything is connected, I check the controller at midday. In full sun, the panel delivers around 18 volts and about 6.1 amps into a 12V system. That is enough to run my small fridge, keep the house battery climbing, and run the little 12V fan I set up for the dogs on warm afternoons. I do not run a microwave or an air conditioner off this panel, and I do not try to.
Do not expect full output in shade. If the site is partly cloudy or the panel is catching filtered light through the trees, the amps will be lower, and that is normal. The goal is not a perfect number. The goal is a battery that is higher in the evening than it was in the morning. If you are gaining a few amps over the course of the day, the system is working.
I keep a habit of checking the battery before dinner. If it is climbing, I leave the panel where it is. If it is flat, I move it ten feet and try again. The panel is light enough that moving it is a thirty-second job, and the long cable means I rarely have to move the controller with it. If the fridge is cold and the lights are bright at bedtime, the panel did its job.
Step 5: Adjust once or twice a day, then pack it away
The sun moves, so the panel needs to move with it. I nudge the angle once in the morning and once in the afternoon. That is usually enough. On a long boondocking stay, I will walk the panel around the site to follow the sun, using the long cable so the controller never has to move. The panel is light enough that this feels like moving a camp chair, not like breaking down camp.
When I am done, I fold the panel and put it back in the included bag. The cells are thin, and a dog stepping on a folded panel is a sad day I would rather avoid. The bag keeps it safe in the truck bed until the next site, and it keeps the panel from rattling around with the leveling blocks and the water jugs.
One more thing: give the panel a quick look before you pack it. A wet leaf or a smear of pine sap on the cells will cut the next morning's charge. A soft cloth and a few seconds fixes it. I also check the cable ends for grit before I coil the cable, because a dirty SAE connector is a silent little power leak.
What Else Helps
Beyond the panel itself, three things made off-grid power easier for me. First, I started six years ago with a small panel and a portable power station, and I learned the basics on that before I moved up to the DOKIO. That small setup taught me how to read a controller and why cable length matters, and it cost me far less than the mistakes I would have made on a bigger system.
Second, I top the battery before I leave home, so the panel only has to maintain it, not rescue it. A battery that starts full stays full with a few good sun hours. A battery that starts half empty needs most of the day. Third, I keep the connections clean and tight, especially the alligator clips and the SAE connector, because a loose connection is the quietest way to lose power. Tighten them once and check them when you check the battery.
Also, give the dogs and the cat the shady side of the trailer. They do not care about solar. They care about the fan and the cool spot, and I care about them not napping on the panel. A warm dog on a thin panel is not a charging problem, it is a vet bill problem.
What If the Site Is Shady All Day
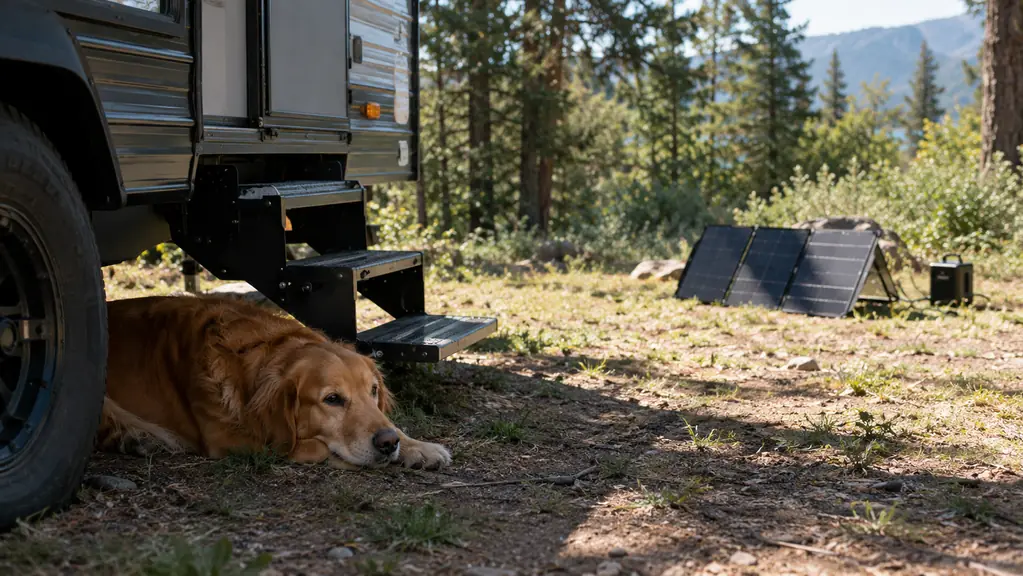
Some sites are shady from breakfast to dinner, and no amount of moving the panel fixes that. On those trips, I plan around it. I run the fridge on propane, I keep the fan use reasonable, and I treat the panel as a top-up instead of the main supply. The DOKIO still earns its place in the truck because even an hour of sun through an opening in the trees is an hour the battery is not draining. It is not about perfect solar. It is about never waking up flat again.
What I Run Off the Battery
To give you a sense of scale, here is what I actually run on my 12V system with this panel: the small fridge, the trailer lights in the evening, the water pump, the 12V fan for the dogs, and charging phones and a couple of small USB things. The point is, a 200W panel in full sun keeps up with that list easily. In shade, it keeps up with the important parts.
A Few Mistakes I Made So You Do Not Have To
My first year, I left the panel flat on the ground facing straight up. It worked, but not well. Tilting it toward the sun made a real difference in the amps, and it costs nothing but a camp chair to prop it on. My second year, I ran the cable under the trailer where a rock pinched it. The system stopped charging and I spent an hour blaming the panel before I found the pinch.
The mistake I see other campers make is hiding the panel under the awning to keep it out of the weather. The panel is rated for heat up to 175 degrees Fahrenheit, it can handle a sunny afternoon. What it cannot do is charge from the shade. If the panel is under the awning, it is decoration. Put it in the sun and let it work.
The 9.84-foot cable is the whole trick: the panel sits in full sun while the controller stays in the shade with the battery.
Make your shady site work with the DOKIO 200W
The DOKIO 200W Folding Solar Panel is the light, foldable kit I keep in the truck on every trip. It folds to about 20 by 27 inches, weighs 9.7 pounds, and the long cable solves the exact problem this article is about.
Amazon Check Today's Price on Amazon →